Sam Doran

My little corner of the Internet

Ansible Reboot Plugin for Linux

Rebooting Linux systems with Ansible has always been possible, but was tricky and error-prone. In Ansible 2.7, I am happy to say that rebooting Linux hosts with Ansible is finally easy and can be done with a single task using the newly minted reboot plugin.

Some History

The win_reboot module was written by Matt Davis and included with Ansible 2.1. Rebooting Windows hosts is a much more common occurrence than rebooting Linux hosts. Necessity is the mother of invention, so it made sense that win_reboot appeared before the equivalent for Linux. And while less than elegant, it is possible to reboot Linux hosts using shell and wait_for or wait_for_connection1.

Rebooting Linux systems with Ansible never felt right to me — much too error prone and finicky. It finally bugged me enough that I refactored win_reboot into reboot so Linux hosts could join the reboot party with their Windows counterparts.

Ansible Vault and macOS Keychain Access

A little known feature of Ansible Vault is the ability to use a script as the Ansible Vault password file.

Alternately, you may specify the location of a password file or command Ansible to always prompt for the password in your ansible.cfg file.

I work on many Ansible projects, each using separate Ansible Vault keys. It became very tedious to enter the password on the command line every time and I really don’t like storing keys unencrypted on disk.1 Luckily, macOS, my development platform of choice, has a built in system keychain as well as a command line tool for retrieving things from it.

I wrote a script that would retrieve the appropriate Ansible Vaulte key from the macOS system keychain based on my current working directory. This allows me to set my vault_password_file once in the Ansible config (or you could use the ANSIBLE_VAULT_PASSWORD_FILE environment variable) and it will always get the correct key based on the current project I’m working on and fall back to a default key.

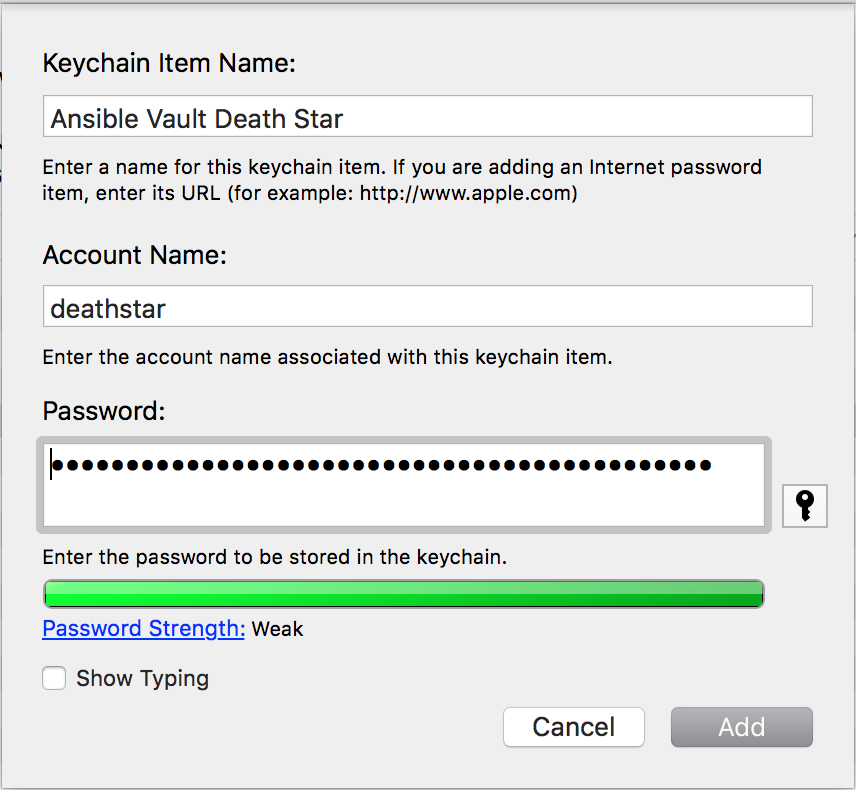
The first step is to store the keys in Keychain Access2. Open Keychain Access and click File > New Password Item…. You’ll be prompted to enter three bits of information: the Keychain Item Name, Account Name, and Password.

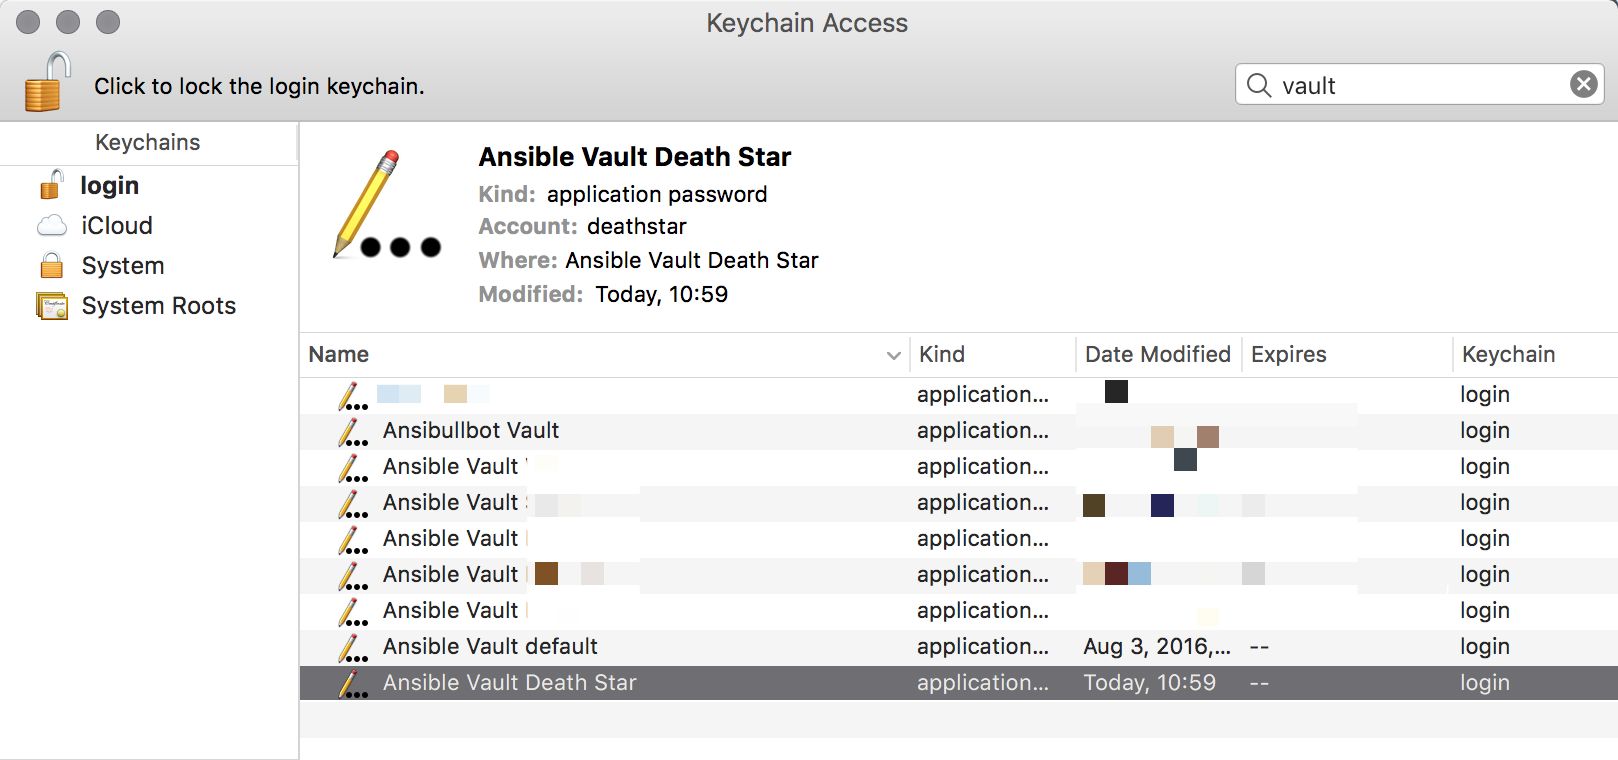
Keychain Item Name is what is displayed in Keychain Access when looking at things and searching. I prefer to name everything “Ansible Vault [project name]” so I can easily find all my Ansible Vault keys simply by searching for “Ansible Vault.”

Account Name is the name you will pass to the security command line tool in order to retrieve the password. Since this is a command line parameter, I like to keep it all lowercase without spaces. I just use the lowercase name of the project I’m working on.

Lastly, put the Ansible Vault key in the password field. It should look something like this when you’re done:
Naming them this way makes it easy to find all your Ansible Vault keys with a simlpe search.
And here is the script:

In order for Ansible to use this, you must make it executable by using chmod +x getvaultkey.sh and set vault_password_file in your ansible.cfg or the ANSIBLE_VAULT_PASSWORD_FILE environment variable to the script location. It doesn’t need to be in your PATH. I like to keep my scripts in ~/bin, which is in my PATH just so things stay tidy.

You can customize the script to add additional case statements based on the paths of projects you are working on. Essentially this is constructing a single command that when run will print out a password and only a password3.

Note that the first time you run this script, macOS will prompt you for your password. This is a security mechanism to prevent malicious code from silently grabbing things out of your unlocked keychain without your knowledge. You will have to authorize each password stored in Keychain Access but only the first time

Hopefully this will make using Ansible Vault on macOS much easier.

  1. I encrypt the entire disk using FileVault, so technically everything is encrypted at rest. But with security, you can’t have too many layers of protection.

  2. I keep everything in 1Password, including my Ansible Vault keys, so I have to create a second copy in Keychain Access.

  3. In Ansible 2.4, Ansible Vault got a big upgrade with regards to vault keys, but this should still work for the foreseeable future.

Ansible Tower Open Sourced

Ansible Tower is one of the most hotly anticipated open source projects in recent memory. People have been asking for an open source version of Ansible Tower very regularly for years. There was even rampant speculation around whether or not Red Hat would even open source it.1

Well, today is the day! Red Hat announced the AWX Project, the upstream of Ansible Tower. AWX runs in containers in OpenShift or directly in Docker and is hosted on GitHub.

It’s been a huge and years long effort by everyone at Ansible. We’re thrilled to open this up to the Ansible community and look forward to the amazing contributions we’ll inevitably get in the future.

I’ve been using Ansible and Ansible Tower for a number of years and have helped lots of folks deploy both large and small scale Ansible Tower deployments. It really is a fantastic way to run Ansible. If you’re just now coming to Ansible Tower/AWX from Ansible, the most powerful features it brings to the table are the API, secure credential storage, job templates2, and the scheduler. Those are the features I find most useful as an avid Ansible user.

Here is the list of things I think give you the most info on the project:

Now go get AWX3!

  1. There was never a doubt internally — we always planned to open source Ansible Tower, but it took time to do it right.

  2. I think of Job Templates as a saved shell history. Instead of searching for the ansible-playbook command and all its args, I can save it as a Job Template.

  3. And please, for all that is good, stop using Jenkins to run Ansible playbooks. No more excuses!

Making Sense of Color Management →

The dark art of color management has been around for quite some time. With the high color gamut camera and display in the iPhone 7, all of sudden people who never had to worry about color management are wondering why the images in their web browser look funny.

The first book I read on the subject was Real World Color Management by Bruce Fraser. It was an excellent and fascinating book, covering topics from physics and the human eye to the mathematical way color is described in computers. It’s an excellent book, but not for the faint of heart. It was tough to get through, but I needed the knowledge at the time since I was working as a photographer and graphic designer.

Craig Hockenberry’s new book is a much more approachable take on the subject. Color management is still tough, but I can’t think of anyone better suited to tackle the subject for a new generation of professionals who never gave a thought to consistent color reproduction.

Once you wrap your head around color management, it’s a great skill to have. You’ll become “that person” on the team who can get the colors to look right. Making yourself indispensable is always a good thing. But more importantly, you’ll spend less time pulling out your hair wondering why in the world your color looks different than it did on your screen.

Performance Tuning Ansible Playbooks

Ansible is a wonderful automation tool that I have used for many years now. I have quite a library of playbooks and roles varying widely in complexity. One thing that got much easier in recent years is measuring and improving the performance of playbooks. Ansible 2.2 brought major performance improvements to the core execution engine. Now is a perfect time for comparing playbook execution time and optimizing tasks and templates.

In the early days, I would prefix ansible-playbook with the time command. This was a handy way to measure overall execution time but didn’t give any metrics on how long each task took to execute. This output doesn’t allow you to zero in on the long-running tasks.

Ansible is built around many types of plugins, one of which is callback plugins. Callback plugins allow you to add some very interesting capabilities to Ansible, such as making your computer read the playbook as it runs. Ansible ships with a number of callback plugins that are ready to use out of box — you simply have to enable them in your ansible.cfg. Add a comma separated list of callback plugins to callback_whitelist in your ansible.cfg.

callback_whitelist = osx_say, mail

The particular callback plugin that will help with performance tuning our playbooks is called profile_tasks which prints out a detailed breakdown of task execution times sorted from longest to shortest as well as a running timer during play execution. timer is another useful callback plugin that prints total execution time, similar to time but with more friendly output.

callback_whitelist = profile_tasks, timer

With those callback plugins enabled, run your playbook the same and you’ll see more output.

1
2
3
4
5
6
7
8
9
10
11
TASK [setup] *******************************************************************
Tuesday 06 December 2016  16:52:42 -0500 (0:00:00.037)       0:00:00.038 ******
ok: [el7]

TASK [gitlab : Include distribution specific variables] ************************
Tuesday 06 December 2016  16:52:42 -0500 (0:00:00.809)       0:00:00.847 ******
ok: [el7]

TASK [gitlab : Copy GitLab repo file] ******************************************
Tuesday 06 December 2016  16:52:43 -0500 (0:00:00.422)       0:00:01.311 ******
ok: [el7]

At the end of the playbook run, you’ll see the following summary output:

1
2
3
4
5
6
7
8
9
10
11
12
13
14
15
16
17
18
19
20
21
===============================================================================
gitlab : RHEL | Install GitLab CE -------------------------------------- 92.86s
gitlab : reconfigure gitlab -------------------------------------------- 79.59s
gitlab : RHEL | Install support packages ------------------------------- 23.69s
gitlab : upgrade gitlab ------------------------------------------------ 15.38s
gitlab : restart gitlab ------------------------------------------------- 6.29s
gitlab : RHEL | Install GitLab GPG key ---------------------------------- 1.99s
setup ------------------------------------------------------------------- 0.77s
gitlab : Copy gitlab.rb ------------------------------------------------- 0.73s
gitlab : Copy GitLab repo file ------------------------------------------ 0.72s
gitlab : Create gitlab-ci user ------------------------------------------ 0.59s
gitlab : Ensure GitLab accounts never expire ---------------------------- 0.54s
gitlab : Start and enable mail ------------------------------------------ 0.44s
gitlab : Create cron job to backup GitLab daily ------------------------- 0.39s
gitlab : Get current GitLab version ------------------------------------- 0.39s
gitlab : wait for unicorn ----------------------------------------------- 0.38s
gitlab : Create cron job to remove old GitLab backups ------------------- 0.27s
gitlab : include -------------------------------------------------------- 0.04s
gitlab : Include distribution specific variables ------------------------ 0.04s
gitlab : Copy GitLab CI SSL certificate ---------------------------------- 0.03s
gitlab : Copy GitLab CI SSL private key --------------------------------- 0.03s

Notice the tasks are sorted with the longest running tasks on top, making it easy to identify the best candidates for optimization. I find this technique particularly useful when working with complex templates that involved loops or nested loops. I have cut some of my playbook execution times down to one tenth the original simply by changing code inside a template.

One thing to note is that Ansible uses the system clock of the control machine when doing its time math. So if you run any tasks that modify the system clock during the play, the output will not be accurate.

I hope this helps you analyze your playbooks and begin to optimize your tasks for faster execution. Also take a look at the callback plugins that ship with Ansible. They unlock some very interesting capabilities when enabled.

Ansible Fest Brooklyn 2016 →

Ansible Fest Brooklyn was an absolute blast. We had record attendance and an entire track dedicated to network automation. There were so many great talks from Ansible team members. Here are some of the highlights:

Ansible Fest is one of the best run conferences I have ever been to and I am thrilled I was able to contribute in some small part to its success.

My absolute favorite part of Ansible Fest was getting to work the Ask an Expert table. There I got to meet some of our wonderful customers who always challenge me in new and exciting ways. I’m honored that I get to help them as best I can. What a privilege!

Check out the video if you’re interested at all in Ansible and security.

Stay tuned for announcements of Ansible Fest in 2017. I hope to see you at the next Ansible Fest!

Let’s Talk Security Automation →

I’ll be giving a talk on security automation at Ansible Fest Brooklyn 2016. If you care at all about security and finding ways to automatically and consistently fix vulnerabilities, you should attend. I’ve been hardening Linux systems for many years and Ansible is by far the best tool for the job. I love using Ansible to solve problems, especially security related problems.

Ansible Fest is the best way to meet the folks at Ansible, get updates on the future of the project, and learn about fun and exciting ways people are improving their lives through automation. I hope to see you in Brooklyn!